Source
Content
- Negative Engineering
- What is workflow orchestration?
- Introduction to Prefect 2.0
- First Prefect flow and Basics
Workflow Orchestration
It’s a set of tools that schedule and monitor work that you want to accomplish. Ex: Scheduling ML models training
Example pipeline:
PostgresQL -> Parquet -> Pandas -> Sklearn -> mlflow
                                      ↳ Rest API ↳ Flask (If deploying)
Random Points of Failure can occur in the pipeline. The goal of the workflow orchestration is to minimize the errors and fail gracefully.
In more interconnected pipelines (Different pipelines interconnected) failure points are more common.
Negative Engineering
90% of engineering time is spent on:
- Retries when APIs go down
- Malformed data
- Notifications
- Observability into Failure
- Conditional Failure Logic
- Timeouts
Prefect’s goal is to reduce this time to increase productivity; The goal is to reduce the time spent on Negative Engineering.
Introducing Prefect
Open Source Workflow Orchestration Framework for eliminating Negative Engineering:
- Open Source
- Python-based
- Modern data stack
- Native Dask integration
- Very active Community
- Prefect Cloud/Prefect Server → Cloud is hosted by Prefect, Server Self-hosted.
Prefect Orion (aka Prefect 2.0) is an overwhole on Prefect 1.0; No backwards/forwards compatibility. It’s in Beta
Current state of Prefect
- Prefect Core (1.0)
- Prefect Orion (2.0 beta)
- Prefect uses Decorators to wrap the code.
Deploying Notebooks
We don’t deploy notebooks, and if deployed they’re deployed as a single step. Notebooks are thus refactored into scripts for deployment
Adding a Prefect flow
We implement Prefect in our code by wrapping the workflow function (which fetches the data, preprocesses it, trains the model…etc) with a @flow decorator as:
from prefect import flow @flow def main(): ...
This enables extra logging.
The main function is what is usually put in a if "__name"" == "__main__": bloc wrapped as a function. (Name doesn’t matter)
Multiple Flows can be put in the same file.
Adding a Prefect task
(Note: Prefect 1.0/2.0 difference: In 2.0 we can mix and match between normal functions and @task functions. In 1.0 we couldn’t)
We can then add tasks by using the @task decorator around our task function (example: preprocessing, training… etc):
@task def train_model(X,y): ...
The output of a function wrapped around a @task is a PrefectFuture object. If we’re mixing and matching normal functions with @tasked functions we need to get the result of the function by calling .result() on the PrefectFuture. For example:
from prefect import flow, task

X_train, X_val, y_train, y_val, dv = add_features(train_path, val_path).result()
Otherwise, we’ll just get the PrefectFuture object (likely with a crash).
Adding a task enables further logging.
Tasks can also have parameters like caching and retries.
Sequential Task Running
If tasks don’t depend on each other, Prefect will run the tasks asynchronously by default. This can’t be handled by MLflow, so in order to force sequential task running we add a parameter to the @flow decorator:
from prefect import flow, task
from prefect.task_runners import SequentialTaskRunner

@flow(task_runner=SequentialTaskRunner())
def main(): ...
Prefect UI
We can open the Prefect UI (In Orion) using prefect orion to spin up a localhost instance. The UI contains information and logs of varying detail about each flow run and where errors may have occured in the process as well as error Stacktraces and task flows.
Parameter Type Validation
If an Orion flow receives a bad parameter type, instead of running the flow and inevitably failing, it will instead not run the flow at all and output a failed run to save compute time.
Remote Prefect Orion Deployment
In order to remotely deploy Prefect. The remote VM needs some ports open:
| Connection Type | Port |
|---|---|
| HTTP | [80] |
| HTTPS | [443] |
| TCP | 4200 |
| UDP | 4200 |
How to do it in AWS How to do it in GCP
(Source could be set as “Anywhere” for AWS or “0.0.0.0/0” for GCP)
To start Prefect Orion, we could follow these steps by Kevin:
-
pip install prefect==2.0b5(Replace with most recent 2.0 version on pip) - Set the UI_API_URL with :
prefect config set PREFECT_ORION_UI_API_URL="http://<external-ip>:4200/api" - Start Orion:
prefect orion start --host 0.0.0.0 - On the local machine, configure the API:
prefect config set PREFECT_API_URL="http://<external-ip>:4200/api" - The remote UI will be visible on port 4200. Example: http://1.2.3.4:4200
You should see the variables being set with prefect config view.
In case the prefect UI_API_URL or PREFECT_API_URL is already set to an older IP address, we can unset the variable by:
prefect config unset PREFECT_ORION_UI_API_URL
and then set the key as described above. (Replace PREFECT_ORION_UI_API_URL with PREFECT_API_URL for resetting PREFECT_API_URL)
Now when running a script with Prefect Flow, the data should be logged into the remote VM Prefect instance.
Using Prefect Cloud
Instead of running Prefect on a VM ourselves, we could use Prefect’s Cloud service at https://beta.prefect.io which provides token login in addition to all other Prefect features.
Defining Storage for Prefect
In order to view the Prefect current configures storage we use prefect storage ls. By default, Prefect has no storage set and it stores results for runs in a temporary directory in its runtime environment. In order to create storage, we use prefect storage create then selecting the storage type we want.
Creating and Configuring AWS S3 Storage
Free Tier Note: AWS S3 has 5GB free storage for free with somewhat limited read(GET) and more limited write(PUT) ops.
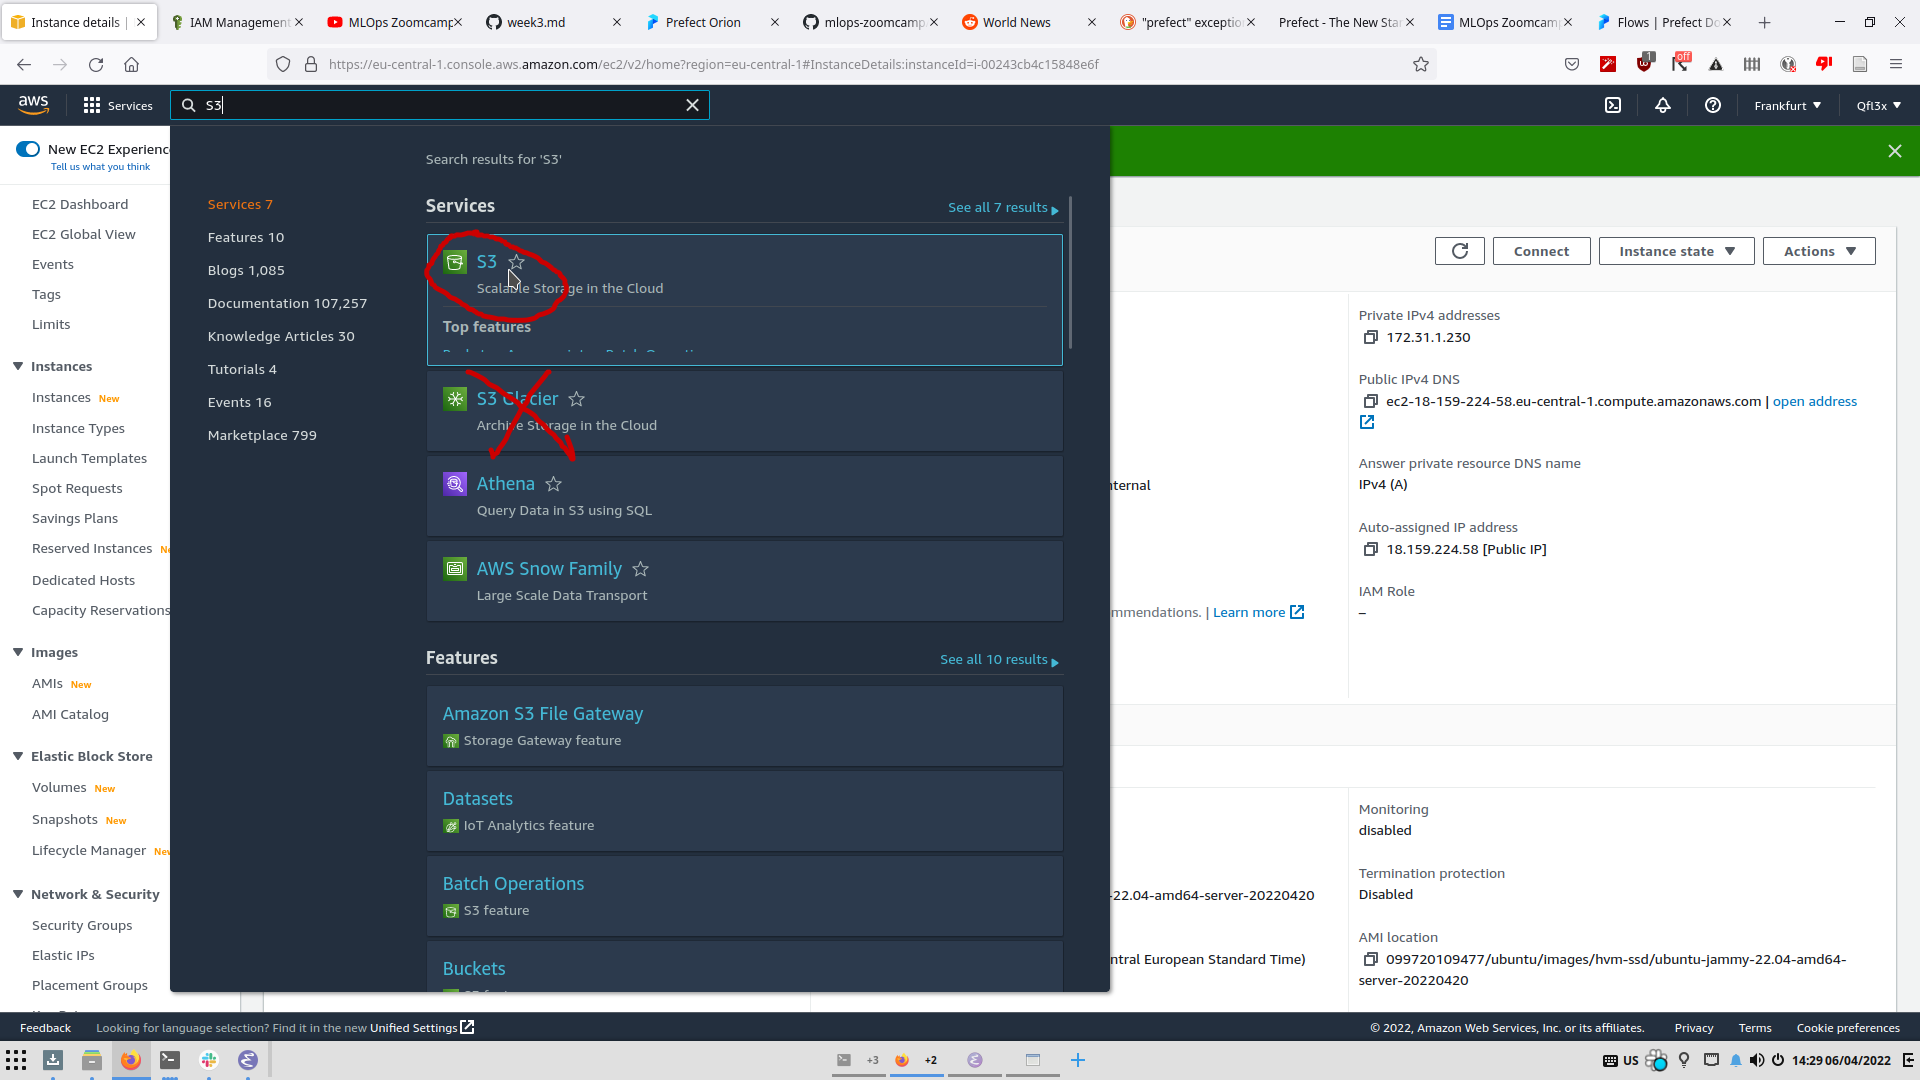
First create an S3 Bucket; Search for S3 in the “Services” search bar and select “S3” (NOT “S3 Glacier”).
Adding a User with S3 Permissions to AWS
In order to access the S3 Bucket with Prefect, we need to add a new user with S3 Permissions:
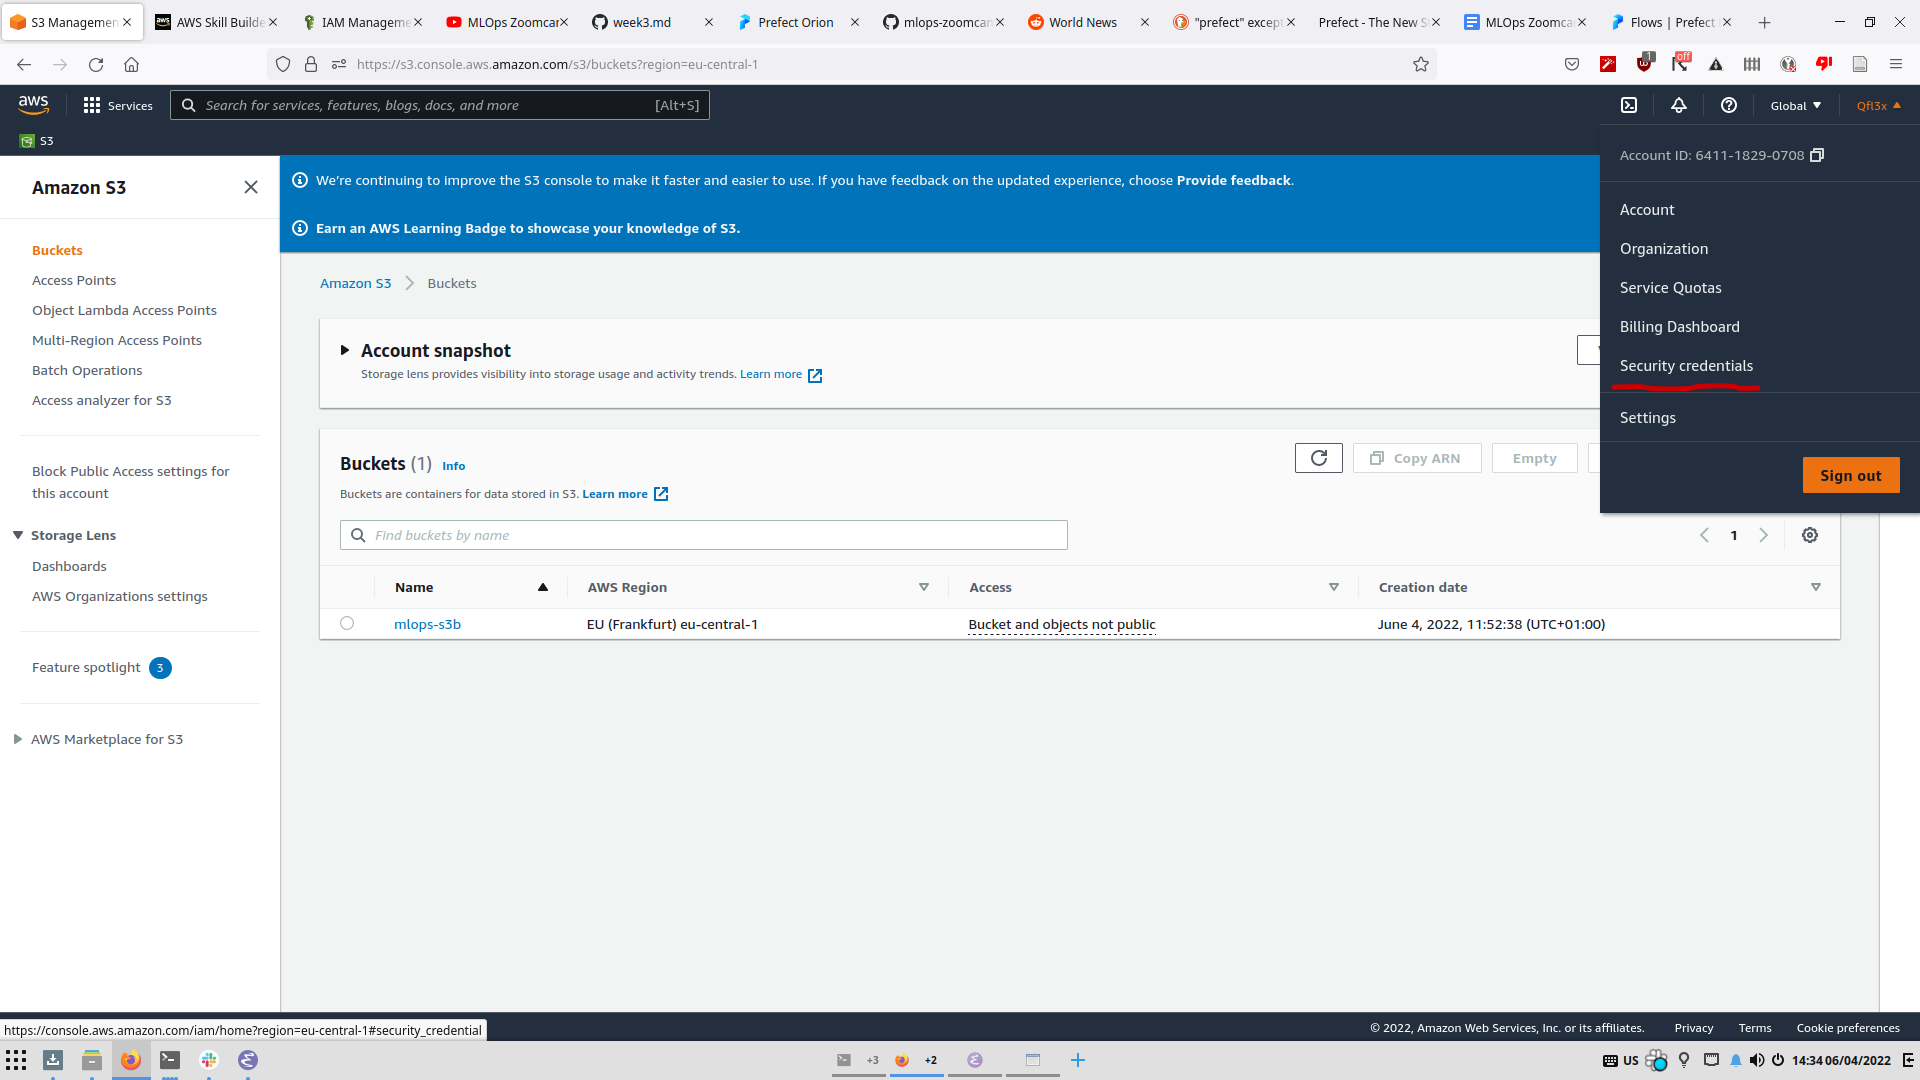
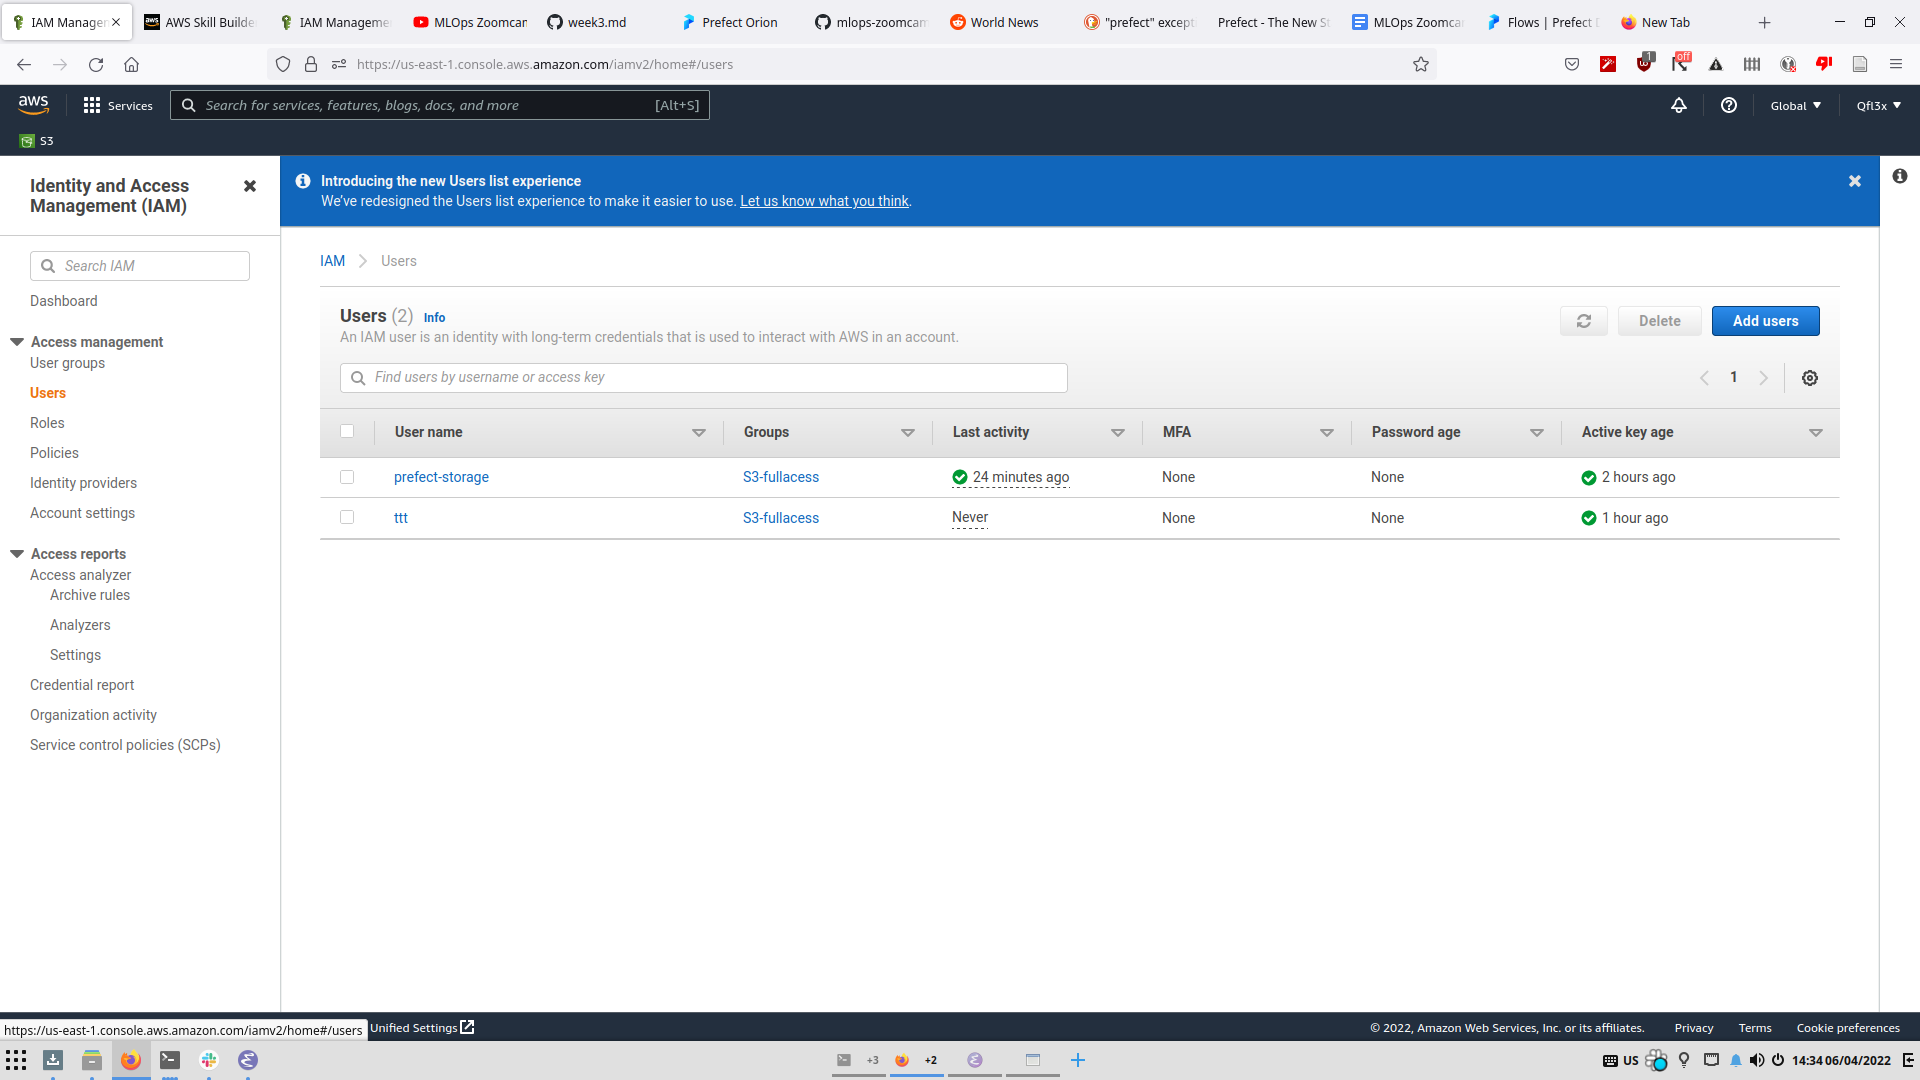
1 - Adding a User: To create the “User” which Prefect will use to access the S3 Bucket, we open the drop-down menu next to the account nameat the top right and select “Security Credentials” > “Users” (Left menu) > “Add Users”.
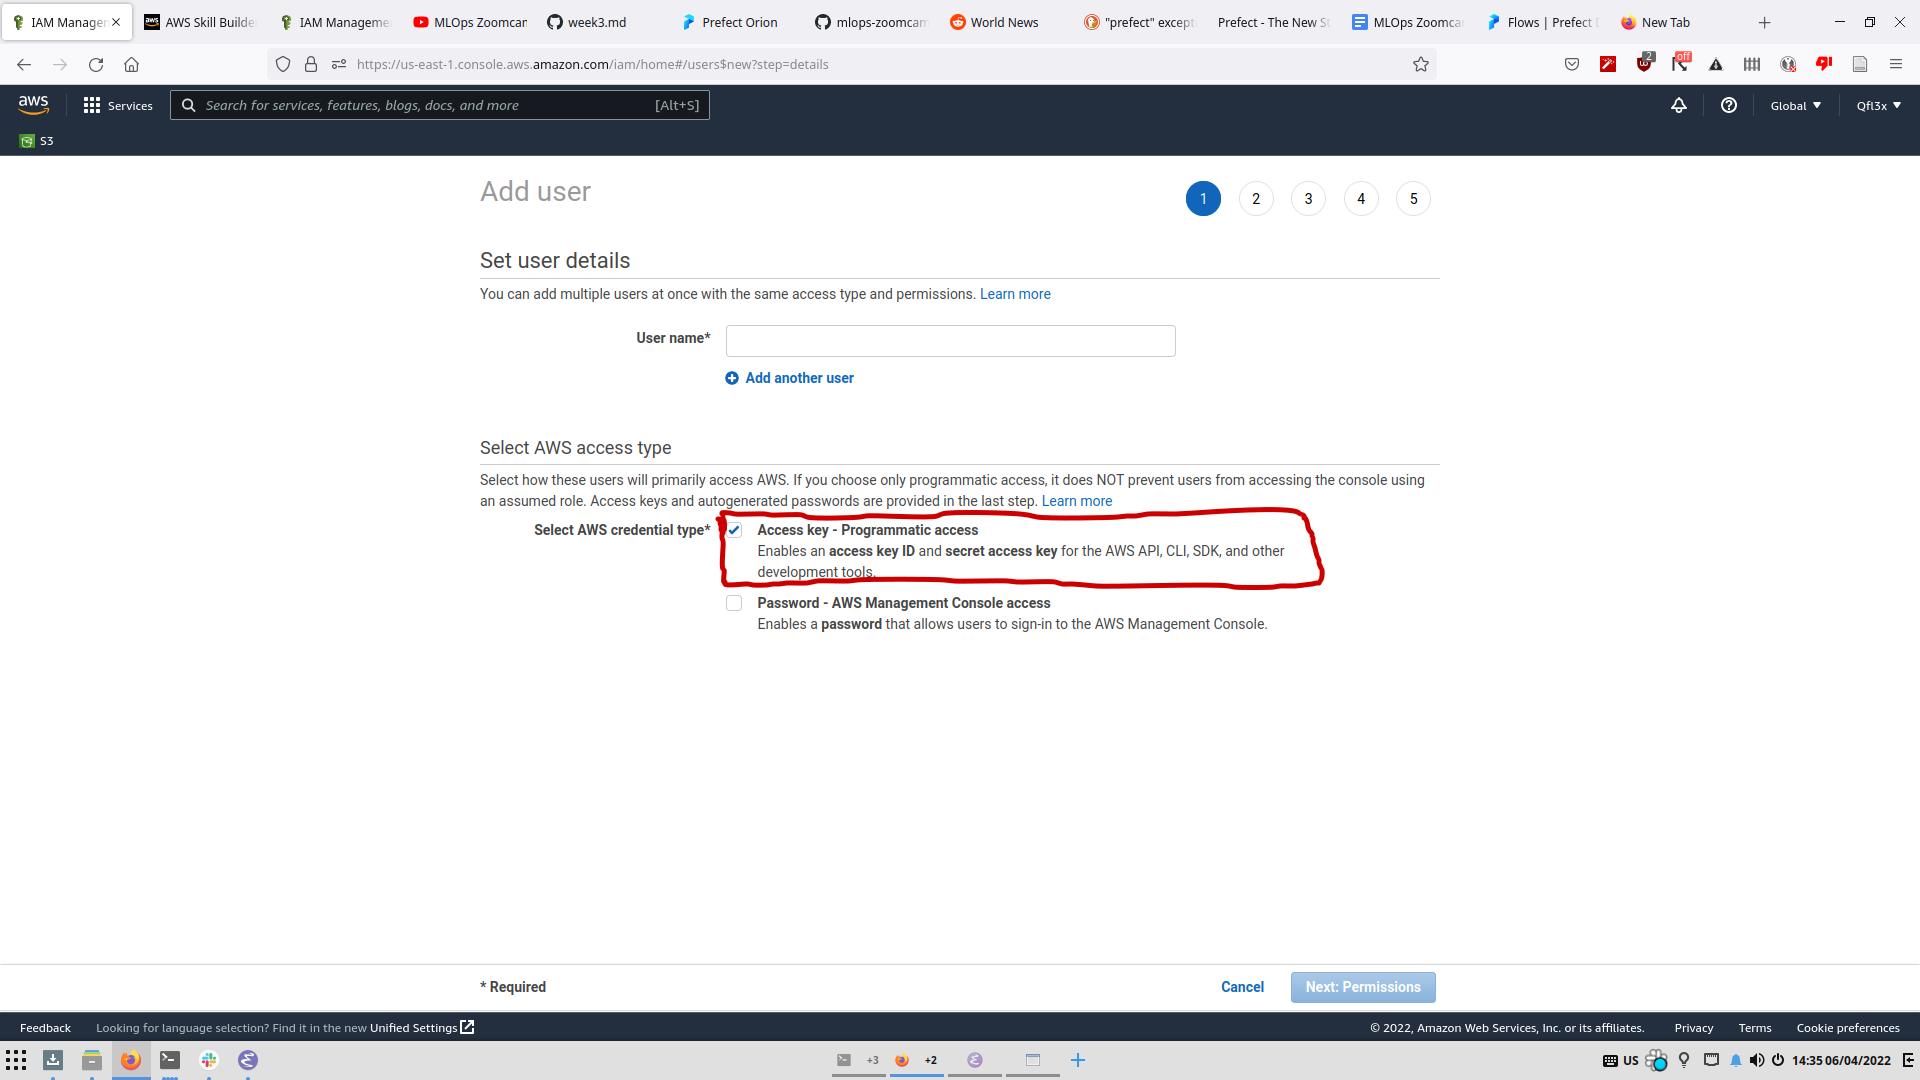
2 - Add a new user (ex: prefect) with an AWS Access Type of “Programmatic Access” and select “Next:Permissions”.
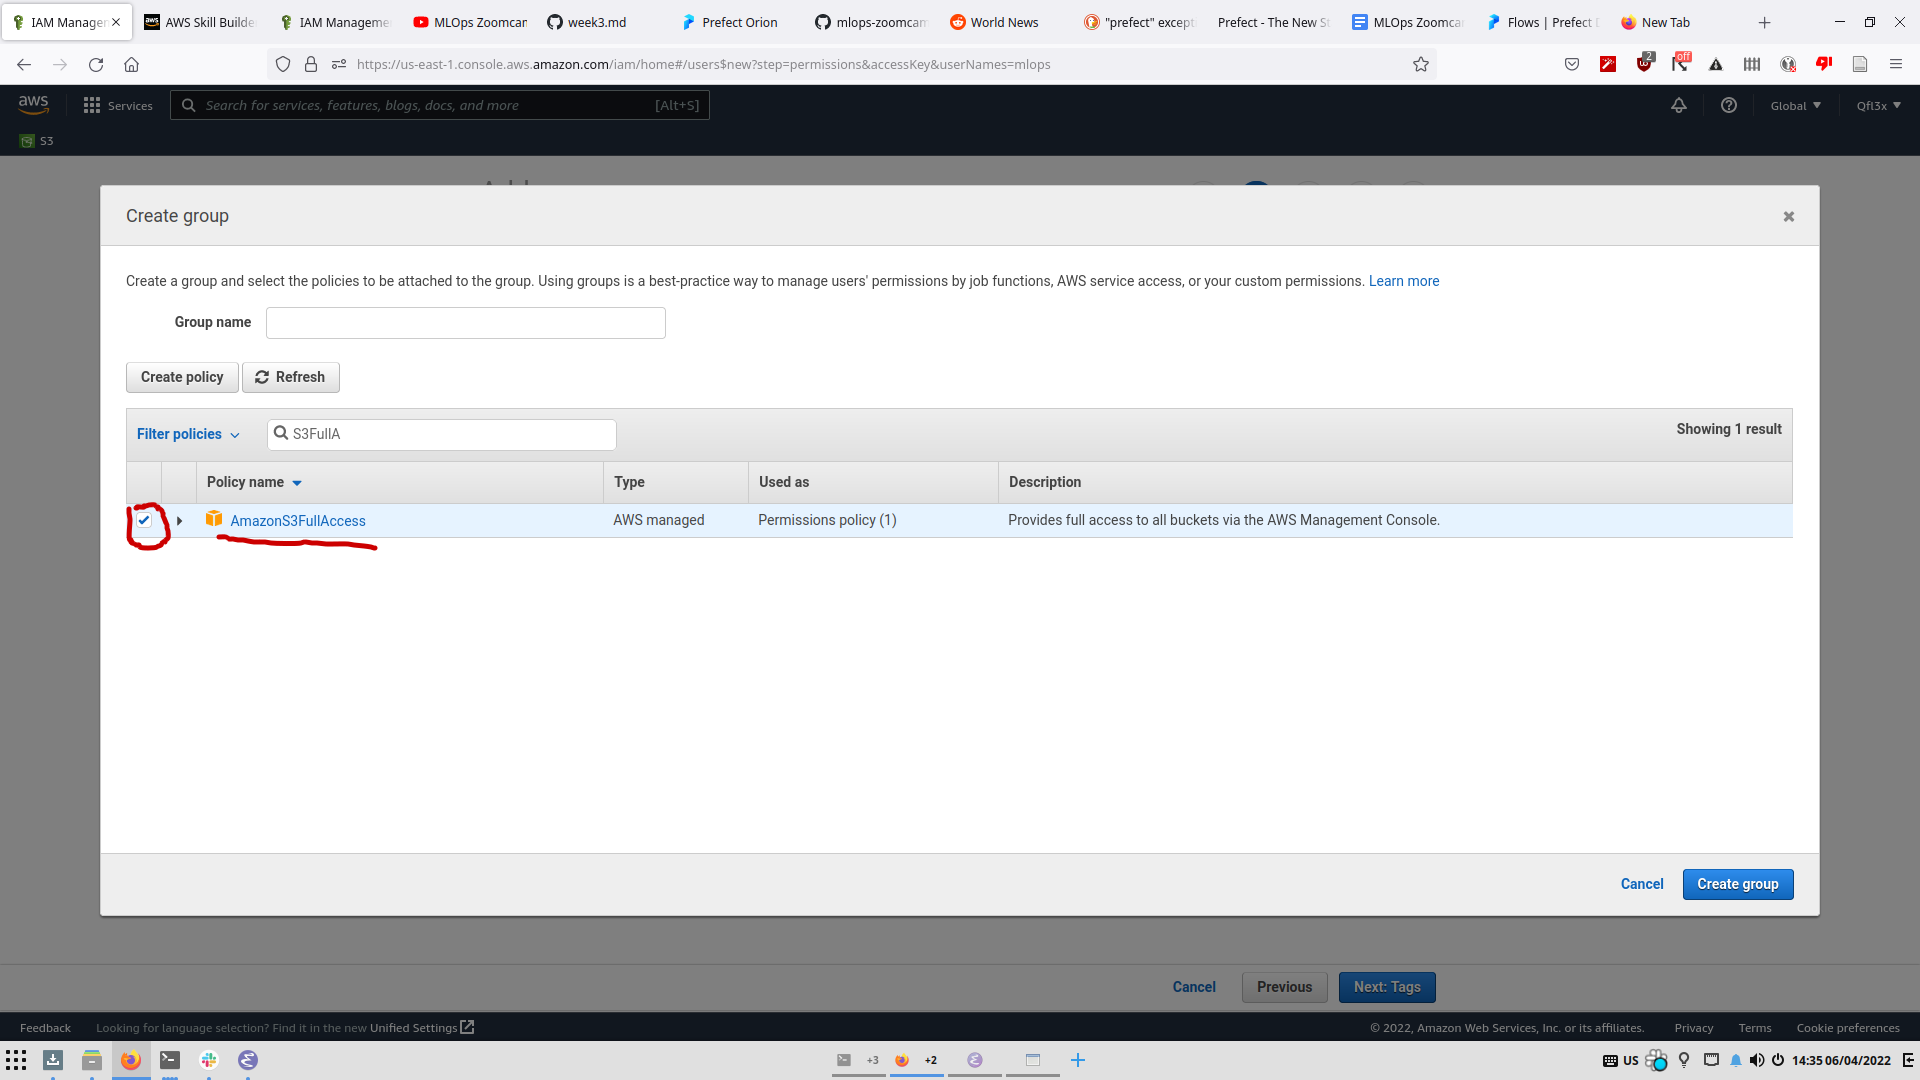
3 - We want to add a group with S3 Permissions and add our user to it; Select “Create Group” and name it (ex: S3-FullAccess) then in the policies search for “S3FullAccess” and select it (If you click on it, it redirects you to the policy details and you’ll have to start over).
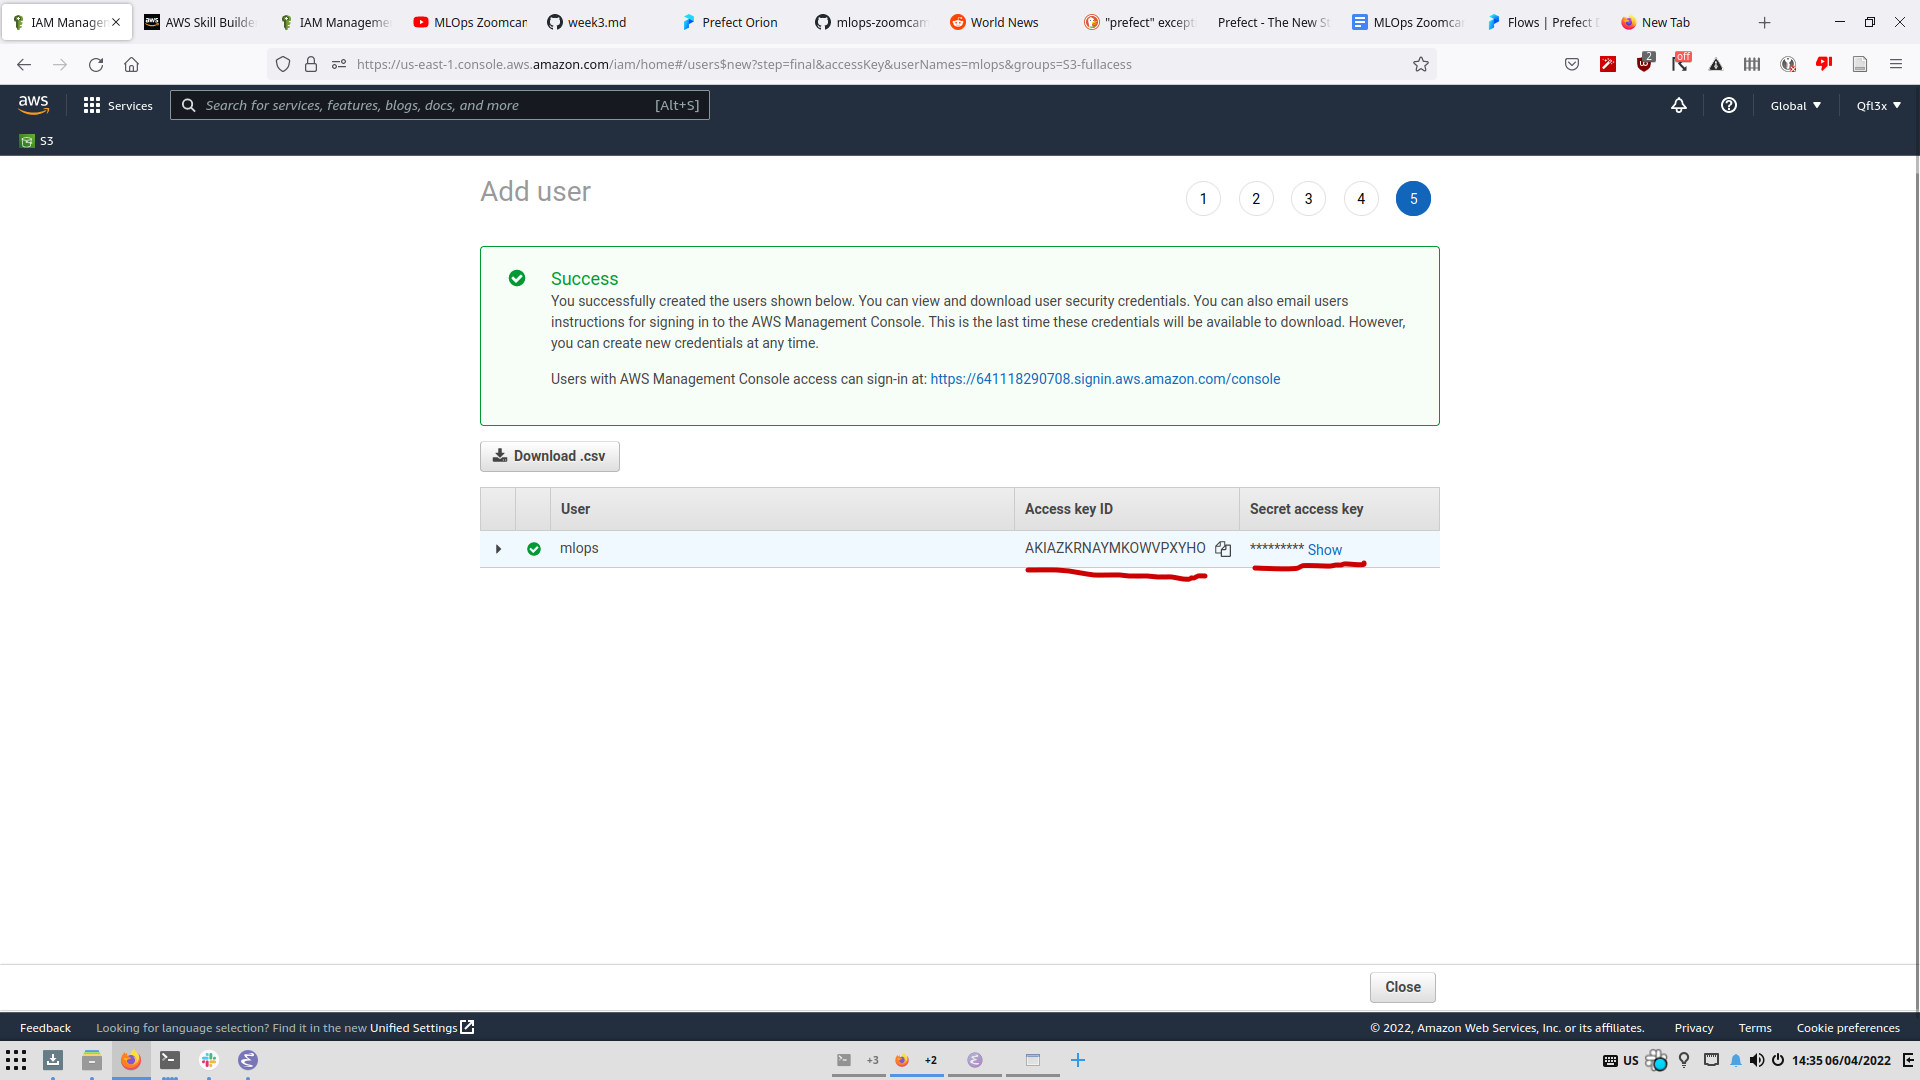
4 - Select the new group and click “Next:Tags” (Put tags here if you want), then “Next:Review” then “Create User”. Don’t close this window! The Access Secret Key is irretrievable once lost!
5 - Create new Prefect storage with prefect storage create and select Amazon S3.
6 - Give the name of the S3 Bucket you’ve created beforehand.
7 - Copy the access key from the User Window and paste it when prompted “AWS ACCESS KEY ID”.
8 - Copy the secret access key from the User Window and paste it when prompted “AWS SECRET ACCESS KEY”.
9 - Skip SESSION TOKEN, PROFILE NAME, REGION NAME (Press Enter).
10 - Choose a “Locally” unique name for the configuration.
11 - When prompted if you want to set it as default, select Y.
Optional: Store the credentials in a CSV file.
Deploying Runs
To store the run results, we have to modify our flow file; First we import:
from prefect.deployments import DeploymentSpec from prefect.orion.schemas.schedules import IntervalSchedule from prefect.flow_runners import SubprocessFlowRunner from datetime import timedelta
Note that SubprocessFlowRunner is for non-containerized runs, if using Kubernetes or Docker we use something different.
We then define a DeploymentSpec:
DeploymentSpec( flow=main, name=“momdel_training”, schedule=IntervalSchedule(interval=timedelta(minutes=5)), flow_runner=SubprocessFlowRunner(), tags=[“ml”] )
flow is the flow to run. (Note main is no longer called explicitly)
schedule is the schedule at which we run the flow. For example here every 5 minutes we run main.
tags are tags associated with the flow. They can be used for filtering for example.
flow_runner in this case specifies that the flow will only be ran locally; i.e: Not on Kubernetes or Docker containers.
To create a deployment, we use: prefect deployment create prefect_deploy.py
this only creates the deployment and schedules the runs. It does not know how to run them. To run them, we use Work Queues.
Work Queues
The work queue a queue that will prompt its attached Agents to run the scheduled runs.
To create a new work queue use the Prefect UI and select work queues in the side panel (A name is required for creating the queue), filtering by Tags is possible. A window will pop that includes the command used to add an agent to the work-queue; prefect agent start <UUID>. With the UUID being the UUID of the work-queue.
We can check the state of the work-queue by using prefect work-queue preview <UUID> where it will show scheduled runs.
Adding a Local Agent
Note: If the storage used is local, and the Agent is ran elsewhere it won’t be able to get the files necessary for the run.
The Agent is what runs the scheduled runs for the work-queue. It checks every 5 seconds whether there is work to do in the work-queue, fetches the flow file from storage and runs it.
To run the agent we use the provided command on the local computer in the work-queue page: prefect agent start <UUID>